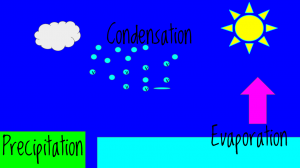
 Third graders at Laburnum Elementary have been learning about the water cycle (SOL3.9), so today students in Ms. Tyler’s class created animated water cycles using Google slides. First we looked at a sample animated water cycle to review. I posted a blank slideshow template in Google classroom and set it to make a copy for each student. On the first slide we clicked the Background button and searched for a good image to represent the water cycle (clouds, ocean, rain, etc). We added a title and our names, changing the font, size, and color to coordinate with the background image. Next, we added a new slide and changed the Background color to a sky blue. We used the shapes tool to place blue and green rectangles at the bottom for the ocean and land. We also used the shapes tool to add an arrow, a sun, a cloud, and a circle for a rain drop. I showed them how to change the border thickness and color of each shape. Once we got the raindrop looking the way we wanted, we copied and pasted it multiple times until we had a bunch of rain drops. Then we grouped them together by dragging across all of them and clicking Arrange > Group. Finally, we added text boxes to label each part of the water cycle (evaporation, condensation, and precipitation). To animate the water cycle, we clicked on the background and then clicked the Transition button at the top. Each object in the picture had to be clicked in the order it was supposed to appear, and we added an animation to it. When the students were finished, they clicked File > Publish to the web and copied the link. We posted them to Google classroom so our classmates could see the, but you can see them here.


