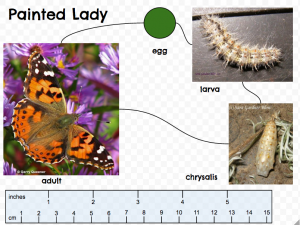
 Second graders at Holladay Elementary have been learning about the butterfly life cycle in science (SOL2.4a), and they’ve been measuring length in inches and centimeters in math (SOL2.11a). Today students in Ms. Gardner’s class created butterfly life cycle diagrams with actual size butterflies. First they logged into Google classroom where I posted a link to a website about Virginia butterflies. This is a great site because its shows the different stages of most of the butterflies’ life cycles. Once the students picked a butterfly they liked, they opened this template that I shared with them on Google classroom. First they changed the title text to be the name of their butterfly. Then they inserted a picture of their butterfly from the website. The template has an actual size ruler on it which they can use to measure the butterfly or they can use a real ruler. I instructed them to resize their butterfly picture (using the corners to keep it from being distorted) so that the image is the same size as the real butterfly. Students found the length of the butterfly on the website (under wingspan). Next I showed them how they could use the drawing tools to draw the other stages in the life cycle or they could insert images from the website. They labeled each stage and added connector lines to link them together. Connector lines (Insert > Line > Curved Connector) are different than regular lines because they link to small dots that appear on the images so when you move the image the line moves with it. Finally we shared our butterfly life cycles with our classmates by posting the links on Google classroom. They also wrote the size of their butterfly in inches on their post. You can take a look at some of them here.


