Custom Menus
Custom menus will help users navigate your blog and can include links to your blog posts & pages and links to external sites as well. If you have one of the many themes (such as Graphene) that supports the Custom Menus feature, you can create and arrange a set of links on your blog. This menu can be created in the header area at the top of your blog and you may have the option to create and display multiple custom menus in different places on your site, such as the footer or sidebar areas.
Content for Custom Menus
View the video on the right to learn how custom menus can be used to do the following:
- Delete or change the order of pages in your menu
- Create links to a category so users can view all posts on your blog for a specific category
- Create “drop-down” menus
- Add custom links to other sites, such as the VA Department of Education
Creating a Custom Menu
To create a custom menu, go to Appearance → Menus in your dashboard.
To create a new menu, click the create a new menu link, then just type in a Menu Name (such as “Main Header Menu), and click the Create Menu button.
Auto-Update Options
After you create your first menu, you will notice that two new options appear to control the following:
- Auto add pages – If checked, new pages will be added automatically to the menu when you create them.
- Theme locations – Allows you to decide where you would like your custom menu to appear. Check the box ‘header’ to place your menu at the top of your blog or you can select a different location if your theme is capable of multiple menus.
- Select Save Menu
Adding Blog Pages To Your Menu
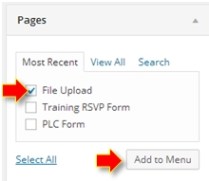
- To add a page from your blog to your menu, select Pages on the left.
- Check the box beside the page you would like to add and then select Add to Menu.
- Continue adding items, select Save Menu or see the section on arranging menus items below.
Adding Blog Categories To Your Menu
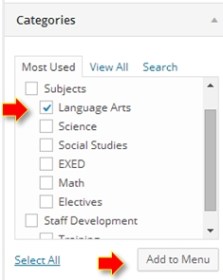
- To add a link to all posts in a specific category to your menu, select Categories on the left.
- Check the box beside the page you would like to add and then select Add to Menu.
- Continue adding items, select Save Menu orsee the section on arranging menus items below.
Adding Other Links To Your Menu
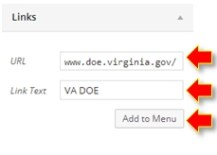
- To add a custom URL to your menu, select Links on the left.
- Type in the URL you would like to add
- Type in a title for the URL and then select Add to Menu.
- Continue adding items, select Save Menu orsee the section on arranging menus items below.
Arrange Links
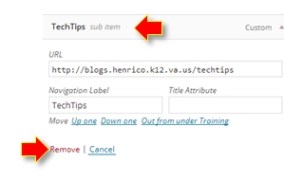
Drag the links you added to your menu to re-order them. In addition, you may drag links to the right to create main and sub menus.
